Friday, March 29, 2013

Restaurant Style: Paneer Butter Masala

Hi Guys !

We all love to eat at a restaurant... most of the times we get so much of a comfort in that delicious tasting vegetable or tandoori roti or even plain rice... but we do not know whats in there? How was it prepared... Were the chef's hands clean? Were the ingredients fresh or for that matter was the dish prepared the very same day for us? But we all know for a fact that there was loads of oil/butter or ghee in it... that is why we cannot eat it everyday ... The other day i was thinking why can i not have my favorite restaurant dish with lesser oil/butter and fresh ingredients at home? So, i decided to make one of my favorites "Paneer Butter Masala" for dinner that night. My husband actually thought that it was ordered from some restaurant and didnt believe it had such less butter in it... I still have that velvety taste in my mouth..am sure you are eager to make it for your family !


So, lets get going !

Gather Your Equipment:

A deep frying pan with a lid
Mixer/Blender

Ingredients:

4 Large Tomatoes pureed (do not add water while pureeing)


1 Large Onion cubed into large pieces
1 Clove Garlic (halved)
1 inch of Ginger (skinned and crushed)
1 Large Green Chilli (halved)

250 gms of Paneer cut into cubes or shape of you choice
4 cups of boiling water
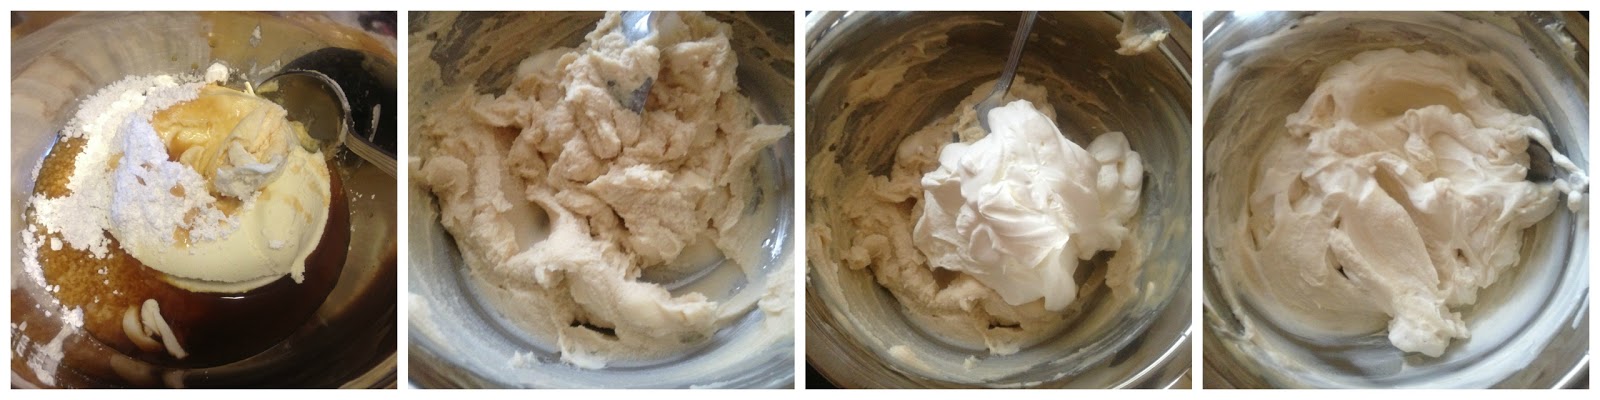
1/2 cup of Heavy Creme
1 tblspn of Butter (unsalted)
1 tblspn of Tomato Ketchup

1 tspn Cumin seeds
1 Pinch of Asafoetida
1/2 tspn of Garam Masala
1/2 tspn of Kitchen King Masala
1/2 tspn of Turmeric Powder
1 tspn of Red Chilli Powder
1 tblspn of Coriander Powder
1/2 tspn of Sugar
Salt to taste

Green Coriander leaves and 1 tspn of creme for Garnish

Method:
  •  Heat the butter in a pan. Add the Asafoetida and Cumin seeds.
  • When the seeds start crackling add the Garam Masala.
  • Wait for 5-10 seconds and add the Onion, Ginger and Garlic .
  • Cook for about 5 minutes on medium-high flame/heat or untill the Onions start turning golden. Remember to not make the onions dark brown.


  • To this, add the Tomato puree and cook for another 7-10 minutes with the lid on. Keep stirring every 2 minutes or so.
  • Turn off the flame, remove the lid from the pan and let this mixture cool down.
  • Transfer the mixture to the blender/mixer. (My blender allows pureeing warm items too, so i didn't have to wait for a long time to blend.)
  • Blend to a smooth puree without adding any water.


  • On the side boil 4 cups of water.
  • Transfer the puree to the frying pan again and cook covered (while stirring every 1-2 minutes) for about 5 minutes.
  • Once the water boils, add the paneer cubes and let it rest for about 2-3 minutes. Reserve a cup of water from this and set aside . Instead of boiling water on the gas i microwaved it with the paneer cubes for about 2 minutes and followed the same process of draining and reserving some water.


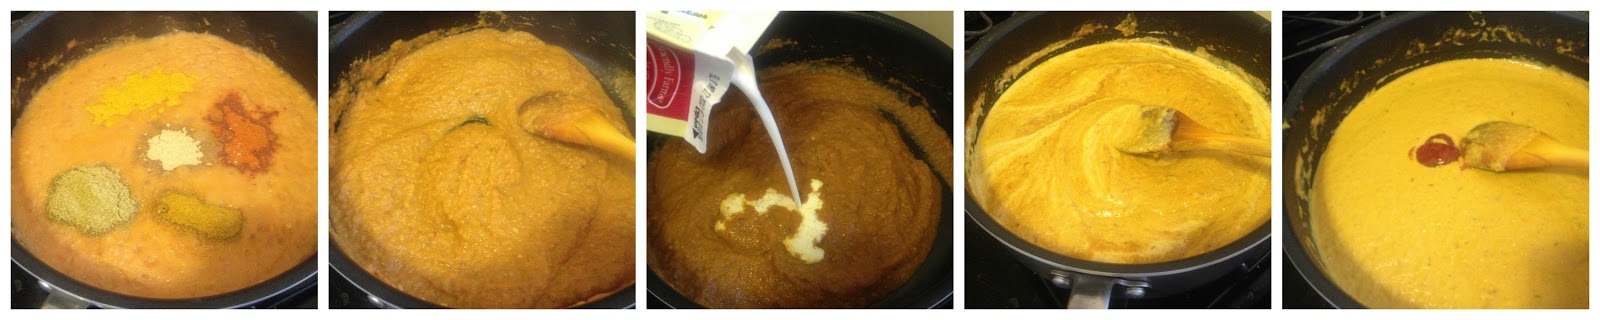
  • To the puree now add,Turmeric, Chilli and Coriander Powder. 
  • Cook for 2-3 minutes and add salt. Cook again for a minute.
  • The puree might be looking a little thick now you can add some reserved wate that came from boiling of paneer and adjust the consistency according to your choice. I added about 3/4 cup.
  • Now add the sugar and Kitchen King Masala. Keep stirring.
  • Cover again and cook for 2 more minutes.
  • Slowly add the Creme while stirring. After two minutes add the Ketchup.


  • Mix well and add the paneer.
  • Be gentle while mixing now because the paneer is very soft after boiling. it may break.
  • Cover and cook for another 3-4 minutes.


  • Garnish with a teaspoon of creme and some coriander leaves.
  • Serve hot with Tandoori Rotis or Naan.


Enjoy this delicious recipe and do not forget to share it with your friends and family... because food tastes delicious only when shared !

Love
Madhu


Wednesday, March 27, 2013

Holi Cup Cakes

Hi Guys !

I hope you all had a very colorful and an auspicious Holi- The Festival of colors. I kept thinking for many days about what should i be making for a sweet for this day, that i could enjoy with my family and friends... and the idea of making colorful cupcakes struck me. These cup cakes can be made anytime during the year for any occasion or any theme party. The icing is optional here.The outside looks amazing and the inside just too colorful. The taste is marvelous and they literally melt in your mouth...


So, lets get started !

Gather your Equipment:

Cup Cake Tin/Moulds (i used the foil tin)
Cup Cake Liners
Sieve
2 Medium size mixing Bowls
2 Small Bowls
Measuring Cups and Spoons

Ingredients:


1 cup plain flour
2 tsp leveled, baking powder
1/2 tsp baking soda
1/2 tin (200 grams) condensed milk
1/4th melted margarine or butter
1 tsp vanilla essenc

3 Food Colors of your choice


Preparing to start:


Line the cup cake tin with liners and keep on a side.


Method:

  1. Sieve the flour, baking powder and baking soda together in a bowl.
  2. Mix the condensed milk, melted margarine, vanilla essence and 1/2 teacup of water in a seperate bowl.
  3. Now mix the sieved dry ingredients with the liquid mix.
  4. Divide this mixture into 3 parts.
  5. In each part, add the 3-4 drops of desired color.
  6. Put 1 teaspoon of each mixture in each cupcake mould, one above the other.
  7. Bake in preheated oven at 370°F for 20-25 minutes. 


 Cool the cup cakes. 


Colorful, Moist, almost melting in the mouth !!!

Icing is totally optional !!!

 
I hope, your family will be very excited when they get to see the colorful surprise inside these cupcakes and will love the taste of it ! Do not forget to share these with your friends too... because food tastes delicious only when shared ! 

Love 
Madhu


Wednesday, March 20, 2013

Traffic Lights : Stuffed & Baked !

Hi Guys !!!

It is a great idea to include foods of various natural colors in our diet everyday. Each different color fruit and vegetables contains unique health components that are essential to our health.

For example, Red Fruits and Vegetables contain nutrients that reduce the risk of prostate cancer, lower blood pressure, reduce tumor growth and LDL cholesterol levels, scavenge harmful free-radicals, and support join tissue in arthritis cases.
Orange and Yellow Fruits and Vegetables contain nutrients that reduce age-related macula degeneration and the risk of prostate cancer, lower LDL cholesterol and blood pressure, promote collagen formation and healthy joints, fight harmful free radicals, encourage alkaline balance, and work with magnesium and calcium to build healthy bones. 
Greens contain nutrients that reduce cancer risks, lower blood pressure and LDL cholesterol levels, normalize digestion time, support retinal health and vision, fight harmful free-radicals, and boost immune system activity.
 
So, with all this information around me I thought why not cook something that can give all the nutrients to my family at once. I created my recipe with these Traffic Lights... Red, Yellow and Green Bell Peppers !The usage of oil is very minimum in this recipe and is very easy to make.


So, lets get started !

Gather Your Equipment:

A baking Pan/Dish
Mixing Bowl
Stove Pan

Ingredients:

Assortment of Bell Peppers (3 in quantity, seeded and cut into quarters)
Potatoes (boiled, peeled and mashed)
1 cup of Boiled Peas
1 small Onion (finely chopped)
2 cloves Garlic
An inch of Ginger
1 pinch of Asafoetida
1 teaspoon of Cumin seeds
2 teaspoons of Coriander powder
1 teaspoon of Chilli powder (adjust accrdng to taste)
1 teaspoon of Lemon juice
1/2 teaspoon of Sugar
2 teaspoons of Cumin powder
Salt to taste
Cooking Spray (optional)
1 tablespoon of oil


Preparing to start:
 
Grease the baking pan/dish with cooking spray or just by apply oil all around.

Method:
  •  Heat Oil in a Pan and add the Asafoetida when hot. Add the Cumin seeds and let them crackle.
  • Add the Onions, Ginger and Garlic. Saute till gold in color. 
  • Add the peas and fry for a minute.
  • Add rest of the spices, salt and sugar. Fry for another minute or so. 
  • Add the potatoes and lemon juice. Mix well and turn off the heat.

  • While the stuffing mixture cools down spray or apply little oil on the insides as well as outsides of the bell peppers and sprinkle very little salt on all of them. 
  • Preheat the oven at 350 degrees Fahrenheit.
  • Once the mixture has cooled down start stuffing the bell peppers with the help of a spoon, pressing the mixture tightly on the bottom as well as sides.
  • Lay them on the prepared baking dish and spray some more oil on the top or just put a drop of oil on each pepper.
  • Put the dish in the oven and bake for about 30 minutes.

  • Serve with any sort of bread that you like or as a side dish to rice.
I hope, you will love making this nutritious dish soon! But do not forget to share it with your friends and family... because food tastes delicious only when shared !

Love
Madhu

Saturday, March 16, 2013

Dessert for Breakfast? Parmesan Chocolate Croissants !

Hi Guys !!!

Me, my parents and parents in law and my siblings... we all love sweets... We could be called a family with sweet tooth... correction...sweet dentures !!!

Desserts carry a lot of calories and can be unhealthy enough when consumed regularly. So, while experimenting few days ago for a low cal dessert and something which is not very sweet (my husband and my daughter do not love anything that is too sweet), i created these Croissants which can be good for anytime of the day... breakfast, lunch or dinner.


Lets get started then.

Gather your Equipment:

A baking Tray
A Bowl for kneading the dough

Ingredients:

1 Crescent Roll (I used the Pillsbury brand)
Or You can make Pizza Dough
3-4 Drops of Green food coloring
1/2 Cup of semi sweet Chocolate morsels
1/2 Cup of powdered Parmesan cheese


Preparing to start:

Let the Crescent Roll be refrigerated until final use. Spray the baking tray with cooking spray or grease with oil. Gather your other ingredients.

Method:
  1. Open the crescent roll ,ad the food color and knead it for a minute or so to make it a little pliable. You may want to put some oil or butter on your hands to make it easier to work with this sticky roll. Remember the food color will only give you some soft streaks on the dough and not change the entire color of the dough.
  2. Divide the dough into 10 equal parts and make them into balls.
  3. Flatten each ball enough to fill with the stuffing and close it again like a ball.
  4. Fill each with a teaspoon of parmesan cheese and 8-10 chocolate morsels (approximately a teaspoon of shredded chocolate).

  1. Close them like dumplings and flatten a little with the help of your palm.
  2. Put the prepared balls in the refrigerator while your oven preheats at 350 degrees Fahrenheit.
  3. Arrange the Croissants on the prepared baking tray and bake for about 25 minutes or untill they become golden brown. Do keep an eye on them.

Remove from the oven and let them cool.


I hope, your home would be soon filled with the aroma of these Chocolate Parmesan Croissants ... and you would feel like in a French Patisserie ! But do not forget to share this delicacy with your friends and family... because food tastes delicious only when shared !

Love
Madhu

Wednesday, March 13, 2013

Pizza Pinwheels : A mouthwatering Appetizer

Hi Guys !

Pizza Pinwheels are a great appetizer for any occasion, be it a birthday party, kitty party or cocktail party. They taste the best when served warm. Very easy to prepare and are gone before you know.
This dish is sure to call for not only a 'once more' but 'many more' !

I made them last night and the aroma of it filled not only my home but the whole floor right upto the elevators. So, lets get started with this delicious appetizer !


Gather your Equipment:

A Rolling Pin
A Rolling Board ( I used the chopping board )
A sharp Knife
A baking Tray
A mixing Bowl
A Shredder
A Spatula

Ingredients:

1 Crescent Roll (I used the Pillsbury brand)
Or You can make Pizza Dough
1 Cup of shredded Paneer
1 1/2 Cups of assorted vegetables finely chopped ( I used Red, Yellow & Green Bell Peppers and Onions)
2 Teaspoons of Soy Sauce
1 Tablespoon of Tomato Ketchup
1 Teaspoon of Red Chilli Sauce
Salt to Taste

Preparing to start:

Let the Crescent Roll be refrigerated until final use. Spray the baking tray with cooking spray or grease with oil. Gather your other ingredients.


Method:

1. Mix the shredded Paneer, chopped Vegetables, all the Sauces and Salt. Keep this aside.

2. Open the Crescent roll and lay it over the Rolling Board or on a clean surface. Join the perforations on the roll and with a light hand use a rolling pin to make the dough even. Remember, you don't have to roll it but just make it even.

3. Spread the Paneer mixture evenly on the roll leaving the sides.

4. Start rolling to form a cylinder.

5. The dough would have got a little sticky by now and difficult to work with. Put the roll in the freezer for 10 minutes. After 10 minutes just flip the roll and freeze for another 10 minutes for even texture.


6. In the meanwhile, preheat the oven on 350-400 degrees Fahrenheit .

7. Remove one roll at a time from the freezer (i.e., if you have more than one) and lay it on the board, away from the oven and cut into wheels of a about a quarter inch width. Lay the rolls on on the prepared baking tray.

8. Bake for about 18-20 minutes and you will see them turning golden brown. Do keep an eye on them. If you like the texture to be crispier you can increase the temperature for last 2 minutes and then shut the oven completely. Let them sit in the oven for another 2 minutes and then remove. Let them cool.


9. Remove with the help of a Spatula and serve them warm to your loved ones.


I hope, you would be soon making these mouthwatering Pinwheels and do not forget to share with your friends and family... beacause food tastes delicious only when shared !

Love
Madhu


Sunday, March 10, 2013

Rava Dosa : A very pretty Dosa

Hi Guys !!!

I always thought of making this but the idea of it scared me...what if it doesn't look and taste the way it should... what if i dont get that crispy net all over... or what if i burn my hands... i may not have the right equipment to make it... so finally yesterday i gave into my fears and jumped into trying it.  And believe it... it turned out that even I can make such pretty rava dosas... So, if someone like me can do it, you can do it too ... lets get started !


Gather your Equipment:

A non stick Tava/ Griddle/Wide pan
A piece of cloth (maybe a small handkerchief or a thick paper towel)
A deep laddle/spoon
A wooden spatula

Ingredients:

1 cup of Sooji/ Semolina flour (i used the coarse version)
1/4th cup Rice Flour
1/4th cup Plain Flour
1 teaspoon of Cumin Seeds
Salt as per the taste (i added a little lesser than a  teaspoon)
2 cups of water

1/2 Cup of finely chopped corriander
1 teaspoon of finely chopped green chillies

Oil for cooking

Preparing to start:

Mix the Flours, Cumin seeds and salt. Slowly add water to this mixture and bring it to a consistency of buttermilk. The batter should be very runny so you would require to use all the 2 cups of water . Set this aside for 30 minutes.

When you are ready to make your Dosas, put the Tawa/Pan on high flame.  While the pan gets ready add the corriander and chillies to you batter and give it a good stir .

To check if your Pan is ready sprinkle some water on it and it should make a sizzle. If it doesnt you have to wait and let it get further heated. Check again and once the water sizzles you know you are ready to go for it. Pour about 2 teaspoons of oil on it. Wet the piece of cloth or the paper towel and just go over the pan in order to cover it with the oil evenly.

Method:

1. Stir the batter (the flour may settle down very quickly and thats why it is imporatnt to give it a stir every time you use it), fill up the deep laddle with it and pour the mixture in the pan starting from sides (remember this is not like the regular dosa where your laddle will go over and create a circle- your laddle should not touch the pan) and come to the center basically covering the circumference you want (i covered the whole pan). You may have to fill up your laddle again for the same dosa. Remember, do not go over the area where you have already poured the batter. You will see beautiful net formed, as you pour the batter and it sizzles.


2. Add a tablespoon of oil on the sides of the dosa and some  drops all over.Your gas flame should be on high all the time.

3. After about two minutes you will see the edges of the dos turning a little brown, slowly put you spatula under it and chekc for color on the other side. It should be golden brown. Flip the dosa and cook for another minute. Remove from heat and serve hot with coconut chutney .

Its very easy to make these dosas and they taste delicious. I hope you will enjoy making these soon. Do not forget to share these dosas with your friends and family... beacuse food tastes delicious only when shared !

Love
Madhu


Thursday, March 7, 2013

Malpuas : Indian Sweet

Malapua is an Indian pancake served as a dessert or a snack. which is also served to Lord Jagannath in his Sakala Dhupa (Morning food served to the lord). It is during Paush Sankranti, Malapuas are prepared in Bengali homes.

The batter for malapua in some areas is prepared by crushing ripe bananas or (in Bangladesh) coconut, adding flour, and water or milk. The mixture is sometimes delicately seasoned with cardamoms. It is deep fried in oil, and served hot. The Bihar version of this dish has sugar added to the batter prior to frying, while the method prevalent in Orissa has the fritters dipped in syrup after they are fried. Malapua is traditionally made only with thickened milk and a little flour (sometimes rice flour instead of wheat flour).


Although the traditional fried Malpuas taste just heavenly but i tried a less richer version of it, which is easier to prepare and light on the stomach. The taste does vary a little bit from the original version but this can work for frequent eaters.

So, lets get started. This recipe has three stages, all very simple.

Ingredients:

For the Pancake:
4 Tablespoons of Plain Flour
1/2 cup creme (i used the heavy creme)
2 tablespoons of milk/water (i added milk)

For the Sugar Syrup:
3/4th cup sugar
3/4th cup of water
2- 3 drops of Rose essenc(or 2 tspns of rose water)
2 pinches of saffron

For the Garnish:
Pistachio and Almond slivers (optional)


Method
For the sugar syrup

  1. Combine the sugar and water in a broad non-stick pan, mix well and cook on a medium flame for 5 to 7 minutes or till the sugar syrup it of 1 thread consistency.
  2. Add the rose essence and switch off the flame.
  3. Add the saffron, mix well and keep aside.

How to proceed

  1. Combine the plain flour , cream and milk in a bowl and mix well till no lumps remain. Keep aside.
  2. Heat a non-stick tava or wide pan and grease it lightly with little ghee, pour a little batter on it and spread evenly to make about 2"diameter circle. After the first you could make 2 or 3 at a time.
  3. Cook on both the sides, using a little ghee, till it turns golden brown in colour. Cook on slow flame and then medium and then high. Be careful while flipping the pancake (it may break... you may want to use two spatulas)
  4. Dip the malpua in the warm sugar syrup and remove in 8-10 seconds.
  5. Repeat with the remaining batter to make more malpuas.
  6. Serve immediately garnished with almond and pistachio slivers. 


I hope you enjoy making these. Remember, to make them a litttle crispy. You could put the left overs in the fridge and the next day they could be microwaved for a few seconds and enjoyed.

Love
Madhu

Wednesday, March 6, 2013

Italian Heaven on your Plate : Tiramisu (eggless)

Italian Heaven on your Plate : Tiramisu (eggless)

prep time:30 minutes
freezing time :5 hours
serves:6


Tiramisu is a layered dessert, consisting of alternating layers of coffee-soaked Savoiardi biscuits and sweet mixture of mascarpone cheese, eggs and sugar. I am not using eggs for my recipe.
To prepare the biscuit layer, the Savoiardi are soaked in espresso or strong coffee, often with an addition of a flavorful liquor such as sweet Marsala wine or dark rum. I couldn't find the right wine and so i skipped this part.
For the mascarpone cheese layer, a mixture of egg yolks (i used heavy creme instead), sugar and Marsala wine(i used few more tblspoons of espresso) is first prepared , to which the mascarpone cheese is added. The creme is then beaten stiff and folded in to the mascarpone. This mixture is spread over the coffee-soaked biscuits. The layer is then topped with a dusting of cocoa powder, as both a garnish and a bitter counterpoint to the sweetened cheese mixture, and more layers are added.
Countless variations for Tiramisu exist. Some people may use other cakes or sweet, yeasted breads, such as sponge cake, in place of ladyfingers.Other cheese mixtures are used as well, some containing raw eggs, and others containing no eggs at all. Other liquors are frequently substituted for the traditional Marsala wine in both the coffee and the cheese mixture, including dark rum, Madeira, port and brandy.


When i thought of making my first Tiramisu, i was so confused and found a thousand recipes here and there and finally settled for my own. Here it is :

Gather Your Equipment:

2 medium sized bowls
2 spatulas
A wide pan/bowl
8×8-inch square baking dish
Mixer/blender
A sieve

Ingredients:

4 teaspoons instant coffee
2 cups hot (not boiling) water
1 cup thickened cream (heavy creme needs to be whipped)
250g mascarpone cheese
1/2 cup caster sugar (also known as confectioners' sugar)
4 tablespoons of coffee liquor (i skipped it as i couldnt find the right one and used espresso instead)
20  ladyfinger biscuits (if you cant find it, just use a plain sponge cake)
Cocoa powder for sprinkling
Chocolate Truffles and some shavings for garnish
1 tblspn corn starch (sieved)

Method:

  • Combine instant coffee and hot water in a bowl that is wide enough to dip the sponge fingers into.
  • Stir to dissolve coffee. 
  • Place in the refrigerator to cool completely.  It doesn’t need to be chilled, just near room temperature is fine.
  • While coffee is cooling, whip thickened cream to stiff peaks, be careful not to overbeat.
  • In a separate bowl, combine mascarpone cheese, caster sugar and coffee liquor, if using.  If you’re not using coffee liquor, take out 4 tablespoons from your brewed coffee and use it instead.  
  • Stir mixture until smooth and creamy.
  • Gently fold the mascarpone mixture and  corn starch into the whipped cream and set aside.

  • Remove coffee from the refrigerator and dip the biscuits in it, one by one, for about 2-3 seconds each.  
  • Immediately place the fingers into an 8×8-inch square baking dish to form one single layer (break some in half if you need to).  
  • Spread half of the mascarpone mixture evenly on top.  

  • Dip remaining sponge fingers, as above, to form one more single layer, then spread remaining mascarpone mixture on top.  
  • Dust the top with sifted cocoa powder and garnish with truffles(optional) and chocolate shavings (optional). Refrigerate for about 5 hours to firm up, then slice and serve cold. 


Some Tips : If you feel its a little loose to cut, freeze it for 30 minutes (do not forget to cover the tray) and then cut. Be careful while removing the pieces....this is a delicate tasting dessert also very delicate to handle. You can also make this in wine or martini glasses for individual servings (thats how traditionally tiramisu was served).


Well, i hope you have enjoyed reading this and will love making it..just remember, with Tiramisu... all you need is patience and following of steps.